If you’re interested in growing your own crystals, one of the easiest crystals you can grow is copper sulfate crystals. These crystals are a popular science experiment for students interested in science, and it’s fascinating to see how they form.
In this article, we’ll advise you on how to make your own copper sulfate crystals. We’ll tell you what you will need to make them and where you can find the materials you need.
However, we must note that when growing copper sulfate crystals, you must ensure that you have the correct safety gear.
Along with making your own large copper sulfate crystals, we have included how to make copper sulfate crystal clusters as a side project while you wait for your large crystal to develop.
Many people use copper sulfate in agricultural settings, so you can easily find them in home depot stores. You’ll find that copper sulfate is used as a type of fungicide, algaecide, root killer, and herbicide.
Due to its use in agricultural and gardening settings, it should be noted that copper sulfate is toxic to humans. It shouldn’t touch your skin or eyes, nor should you ingest it.
Copper sulfate is known to cause severe eye irritation, and if ingested, you’ll find that it can lead to nausea and vomiting and can damage tissue in your body.
However, these issues will only arise if you ingest or touch too much of it.
Many schools (see also, ‘14 Best Crystals for School‘) make copper sulfate crystals in their labs. Making crystals is a fun experiment to do, especially when done responsibly. Therefore, we recommend you follow our advice closely when making your own at home.
Types Of Copper Sulfate Crystals
When you make your copper sulfate crystals, it is essential that you know that you can grow two different types. There are both single crystals and crystal clusters.
However, you’ll find that these types of crystals are made with different solutions. If you want to grow a copper sulfate crystal cluster, you must have a supersaturated solution.
This article will inform you how to make a single large copper sulfate crystal. We’ll go into more detail about saturated and supersaturated solutions later on, but first, let’s find out what you need to make your own copper sulfate crystals at home.
What Do You Need For Growing Copper Sulfate Crystals
If you want to make your own large copper sulfate crystal at home, you will need some materials to make it happen. These are the main tools you will need to ensure that you can make your crystals correctly:
Copper Sulfate Powder — This is one of the main ingredients to make your solution, and it can be bought from home depot stores or online.
Hot Water — You will need hot water to mix with the copper sulfate powder to make your solution.
Two Large Jars — You will need two large jars to store your solution. We will go into more detail about why you need two jars later in the article.
Flat Dish — You will need a flat dish to transfer your crystal over. The main requirement of the flat dish is that you need to ensure that it isn’t made of metal.
A Spoon — You need a spoon to mix your solution.
Filter Funnel — You will need to use this to filter your solution when needed.
Nylon Fishing Line — You will need a nylon fishing line to suspend your chosen crystal in the solution. We will go into more detail about this later in the article.
Electronic Balance — You will need an electronic balance to measure the mass of your crystal.
Saturated Vs Supersaturated Solutions
The type of solution you use to make copper sulfate crystals will help identify the type of crystal you make. If you make a room temperature saturated solution, it has the maximum amount of copper sulfate dissolved.
For example, 100 ml of room temperature water can dissolve roughly 50 grams of copper sulfate. Although you can dissolve more copper sulfate in hot water, you will have a supersaturated solution if you let it cool.
As we’ll be growing one single, large crystal, you’ll learn how you can grow a copper sulfate crystal with a saturated solution.
If you have a supersaturated solution, there will be even more copper sulfate, making it difficult to make your own copper sulfate crystal.
Single crystals are notoriously more difficult to grow than a copper sulfate crystal cluster, and there are a few more steps to the process. So, please make sure to follow our instructions, so you know how to make your own crystals.
How Do You Grow Larger Copper Sulfate Crystals
In this section of our article, we will be explaining how you can grow a large copper sulfate crystal. There is a step-by-step process to follow, so we’ll discuss how you can grow them safely in your own home.
Growing Copper Sulfate Crystals Safely
Copper sulfate is regularly used in high school science labs, so it is best to handle them safely. As they’re a copper compound, they are a little toxic, so it is best to wear gloves when handling them.
If you handle them once without gloves, it won’t harm you, but prolonged exposure can negatively affect you.
It is best not to get copper sulfate in your eyes, so along with gloves, we recommend wearing safety goggles. Wearing goggles will prevent you from accidentally rubbing your eyes so that you won’t be irritated by the compounds.
If you’re doing this experiment with children, we recommend choosing another type of crystal. Your child may accidentally ingest copper sulfate; if they ingest it, they will need to go to the hospital.
Instead, search for some non-toxic crystals and then introduce them to copper sulfate crystals when they’re older.
Where Can You Find Copper Sulfate?
Crystalizing copper sulfate is a relatively simple experiment that you can do at home. Copper sulfate itself is often used for agricultural purposes and gardening, as it is often used for fungicide and to eliminate other unwanted guests in your garden.
You should be able to find copper sulfate at a gardening specialist or a Home Depot near you.
You shouldn’t be concerned if they’re powdery or crystalline, as you will be dissolving them anyway. We recommend purchasing copper sulfate online if you can’t find them in the store.
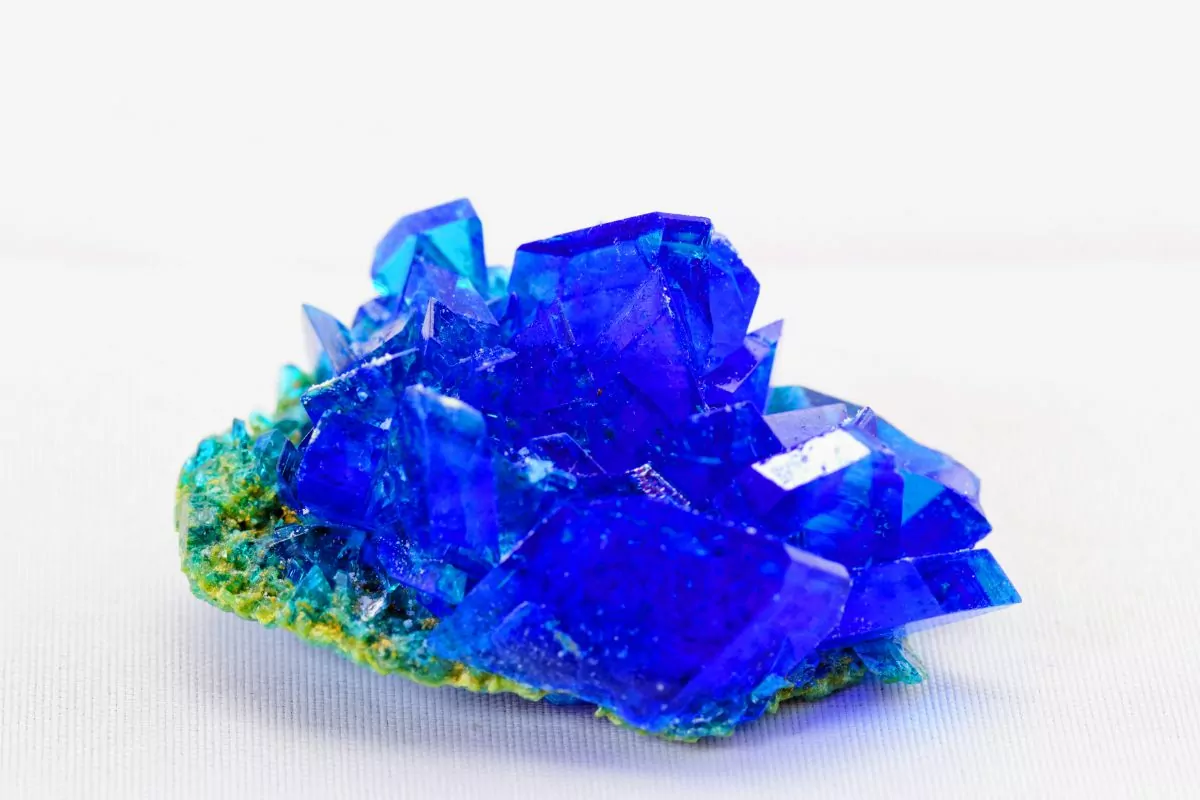
While it doesn’t matter if the copper sulfate is powdery or crystalline, the color of the copper sulfate may affect your crystals. If the powder is a pale or turquoise color, we wouldn’t recommend them as they aren’t from as pure a source.
Instead, you should look for copper sulfate with a deep blue color to ensure that your crystal will be as pure as possible.
In the next section, we will go into further detail about what happens if you find impure copper sulfate for the experiment.
How To Prepare The Solution
To prepare your solution, you will need a measuring jug and your copper sulfate. For every 100 ml of hot water, you have in your measuring jug, put in roughly 50 grams of copper sulfate powder.
It doesn’t matter if you go up to 55 grams of copper sulfate for every 100 ml of hot water.
Once the powder has dissolved, the copper sulfate solution should be a clear blue in color or even a slight hint of purple.
Make sure that it’s not cloudy, or it may contain impurities, and while you can continue the experiment, you won’t have the desired results.
Instead, we recommend you purify your solution. If you need to purify your solution, please head to the next section.
If you want to continue, wait for the solution to cool so that it’s at room temperature. Once your solution is at room temperature, you should filter the solution through your filter funnel.
If you don’t have one on hand, we recommend using tissue paper or even some coffee filters to ensure your solution doesn’t have any undesirable elements.
Pour your filtered solution into one of your two jars, and sprinkle a tiny amount of copper sulfate powder into the solution. Once you’ve done that, leave your jar alone overnight.
Making a saturated solution of copper sulfate is a challenge, so it is better to start with a supersaturated solution, as we have directed you through.
However, including additional copper sulfate in your solution will help your crystals grow as they absorb the excess copper sulfate.
After leaving it for a day, the excess should be absorbed, and you will notice how a collection of crude crystals is at the bottom of your jar.
This is where you will need your flat dish, and you need to ensure it isn’t made of metal. You can pour 50 ml of your copper sulfate solution into this dish and then pour what you have left into your second jar.
All you need to do is leave the rough crystals in the original jar, as you can reuse them in your other projects.
How To Purify Your Solution
We recommend purifying your copper sulfate solution if it is cloudy. While you can still grow a crystal in an impure solution, it won’t look as refined as it would with a pure solution.
An impure copper sulfate crystal will be rough and jagged and incorporate white inclusions. However, a pure copper sulfate crystal will be translucent, flat, and sharp.
If you’ve tried to grow your copper sulfate crystal, but it hasn’t been growing correctly, we suggest you purify your solution. You can tell that the solution is impure by its cloudy disposition and may even have a greenish tint.
Re-Crystallization Process
To purify your solution, one of the easiest ways to do so is by re-crystalizing it. During this process, you grow your crystals in your impure solution, which will only consist of copper sulfate ions that exclude any impurities.
You then take them out, wash them, and re-dissolve them to make a pure solution.
The recrystallization process works similarly to the steps above, including the measurements of 50 grams of copper sulfate to 100 ml of hot water. If the sulfate isn’t dissolving, you need to heat it a bit more and stir.
Filter it, and discard the residue from it. You’ll find that the residue mostly consists of dust and sand and maybe a few insoluble copper compounds.
As we mentioned in the previous section, the mixture we’ve established is a supersaturated solution, and so if it’s supersaturated at room temperature, the crystals should form immediately.
Once the crystals form, you should put them in the fridge for a day, as cooling them will decrease the solubility of the copper sulfate in the water, enabling more crystals to grow.
There should be many crystals at the bottom of your container. When satisfied, place the remaining solution into a separate container.
Repeat The Process
Heat your remaining solution after you’ve washed the crystals and stored them away. It’s important that you wash these crystals in cold water to ensure they don’t dissolve.
Once only 70% of your solution remains, wait for it to cool down, sprinkle some copper sulfate powder on it to induce crystallization, and put them in the fridge for another day.
After you’ve washed them again, store them with your other old batch from the day before.
You need to keep repeating these steps until the solution is between 10% and 20% of its original volume, which will essentially be wastewater. In the end, you should have plenty of pure crystals, and you can use them by re-dissolving them in hot water.
If you’re not content with the purity of your solution, you can continue the recrystallization process once more. You can do this once or twice, and by then, you can begin growing your large crystal properly.
How To Grow Your Crystal
Now that you have your solution in your dish, you should put it somewhere in your house where it won’t be disturbed. After one or two days, smaller crystals should begin to form.
Remove the best crystal from the dish, as this will be the one that you will grow to a larger side. You shouldn’t scratch your crystal as you remove it with tweezers.
To help you decide on each crystal, you should ensure that it’s a slightly larger crystal, as you’ll be tying this to your nylon fishing line.
While you may be worried about scratching it with the fishing line, it will grow into the crystal, so it’s easy to remove once it has grown.
Once you’ve tied your crystal to your fishing line, you will need to attach your fishing line to a stick or pencil.
With the fresh jar of solution you prepared, you’ll be able to put the pencil over the jar and suspend the crystal you’ve chosen in the solution.
You can always suspend more than one crystal at a time as a backup option; over time, each crystal will grow in size.
Keep an eye on your main crystal, and consider removing your other crystals to see how they work. Growing your crystals will be a slow and painstaking process, but the end result is worth it.
As your solution evaporates, the excess particles organize themselves to create a perfect crystal. The best thing you can do is leave your jar undisturbed to allow the crystals to grow perfectly.
When you store it away, you should only cover half of the jar with a lid so that the evaporation process slows.
Any slight changes can affect their process, so you shouldn’t leave your solution in sunlight or expose it to any major temperature changes. Instead of removing your crystal from the jar to check the process, you should shine a flashlight at it instead.
After a few days, you may notice some smaller crystals manifesting at the bottom of your jar. You need to remove those, or else they will impede the growth of your main crystals.
Instead of removing one at a time, you should remove the main crystals and decant your solution into another jar.
Once you’ve done that, put your main crystals inside, and it shouldn’t take more than a minute or two, so don’t worry about impeding their growth.
If you have more than one, it is best to consider removing your crystals from the same jar after two weeks. You should put them in a separate container each.
Having more than one crystal in a container can make them compete with one another to grow. The size of the container you use is up to you, and you can decide how large you want your crystal to be.
When you’re happy with the size of your crystal, you can dry the crystal by placing it on a paper towel. You just need to leave it on the paper towel, and the solution will be absorbed.
All you need to do is ensure that you don’t put your crystal in the water, and it’s all good to go.
Storing Your Crystal
Now that you’ve grown your crystal, you need to know how to store it. As there are water molecules inside copper sulfate crystals, you shouldn’t leave them exposed to the air, or they will dehydrate.
When a crystal dehydrates, it will start to dull and turn white. There are two methods you can use to stop this.
You can either coat your crystal with a layer of nail polish or place it in a ziplock bag. If you coat it in nail polish, you’ll protect the surface of the crystal and prevent it from getting dehydrated.
Should you decide to place it in a ziplock bag, we recommend storing it in a sealed container with a small amount of copper sulfate powder. The copper sulfate powder will help stabilize the container and prevent it from dehydrating.
An Abridged Step-By-Step Guide To Growing Crystals
You need to dissolve 50 to 55 grams of copper sulfate powder for every 100 ml of very hot water. Ensure the water is not boiling.
Once the powder has dissolved, wait for the solution to cool, so it’s at room temperature.
If the water looks cloudy, purify it using the recrystallization process.
Once you’re happy to proceed, filter the solution and pour it into a jar.
Put some copper sulfate powder into the jar, and allow it to sit overnight in an undisturbed area.
Pour 50 ml of your solution into a flat dish that isn’t made of metal. Pour the remaining solution into a new jar, and leave any other crystals in your old jar.
Leave the dish aside for a day or two in an undisturbed location.
Come back and select your favorite crystals with a pair of tweezers.
Tie these crystals with a nylon fishing line, attach one end to a pencil and suspend them in your jar of solution.
Cover the jar halfway with the lid, and leave your jar in an undisturbed location in your home.
Once smaller crystals begin manifesting, remove the main crystals, decant your solution, and put them in a fresh jar. Place the crystals back inside, and put the other crystals somewhere safe.
After two weeks, separate your crystals if you’ve selected more than one and place them in separate containers.
Leave them in separate solutions for as long as you want, and once you are happy with the size of your crystals, remove them from the solution.
Dry your crystals, cover them with nail polish, or store them in a ziplock bag to prevent dehydration.
How Do You Grow Copper Sulfate Crystal Clusters?
If you’ve grown crystals and would like to grow more, you can always grow copper sulfate clusters. You will need similar materials that you used when making one large crystal.
You need to dissolve up to 70 grams of copper sulfate powder per 100 ml of water. The water needs to be incredibly hot but not boiling.
If the powder doesn’t dissolve, you need to reheat the solution. The water shouldn’t boil because the compound itself will decompose, and you will be unable to make crystals.
Once the copper sulfate has dissolved, you should filter the solution while it’s still hot. Once you’ve done this, pour it into a jar and cover it, and then wait for the solution to cool down, so it’s at room temperature.
Like when you grow a single crystal, you should tie a seed crystal to a nylon string, however, unlike the single crystal, you don’t need to select an ideal crystal.
You could even choose one of the crystals that came from your previous experiment. Ensure the seed crystal is secure, and suspend it in the solution by attaching the other end of the string with a pencil or a stick.
Unlike a single crystal, the cluster will begin to grow immediately. While a single crystal should grow slowly, this one can grow pretty quickly.
After two days, the crystal will have grown, but it’s better to leave it there for a week to ensure that it has a smoother, more transparent appearance.
If you don’t want to suspend it, you can also grow your crystal at the bottom of a jar. However, this won’t work if you want to grow a single crystal, as the other crystals will attach themselves to it.
Growing a crystal cluster can be a fascinating experience and is often a slightly easier process than growing a single crystal.
If you’re struggling with growing a single crystal, then you can always grow a crystal cluster, especially if you are struggling to grow it yourself patiently.
What Issues Can Affect Your Crystal?
Several issues could impact the way you grow your crystals. Sometimes this is because you haven’t handled the seed crystal correctly, so you should always choose a nice crystal.
However, another issue that could impact your crystal is growth occurring too quickly, or significant environmental changes. Ensure that you follow the correct instructions in this article to know exactly how you can grow your crystals.
Crystal Creep Around The Edges
If a blue crust forms around the rim of your container, you shouldn’t worry. Crystal creep is normal, but if you’re worried, you can coat the rim with vaseline.
However, you can also transfer your solution to a different container and change it around a few times.
Issues With The String
When observing your crystal, you may find crystals growing on the string. This shouldn’t happen if you’re using a nylon fishing line, but it may occur if you continue removing your crystal to see how it grows.
Instead of removing it to observe its growth, you should shine a flashlight on it instead. Likewise, if the string breaks, it may be because you haven’t used a strong enough line or the crystal is too heavy.
Incorrectly Handling Your Crystal
When handling your crystal, you should always wear gloves. This isn’t only to protect yourself from the mildly toxic properties of copper sulfate but because you can’t remove fingerprints from the crystal.
If you wash it, you’ll find that the crystal will begin to dissolve, and so they will remain forever.
Incorrectly Storing Your Crystal
Remember that you should also listen to our storage advice when you’re looking after your crystals. If you find that your crystal is becoming discolored, it’s most likely because you have left it in the open air.
Doing this, you’ll find that it is dehydrating due to the water molecules inside of the crystal. By storing them correctly, you’ll be able to maintain your crystal for a minimum of at least two years.
Final Thoughts
As you can see, growing a copper sulfate crystal is a simple procedure. However, the waiting time is the biggest challenge of growing a large single crystal. Large single crystals need to be grown slower than crystal clusters.
If you want to try and grow some crystal clusters while you’re mastering the art of growing a large single crystal, we have included a helpful guide.
Remember to handle copper sulfate crystals safely, and you’ll be in for a treat with this fun experiment. Once you’ve grown your crystals, you can show them off to your friends and family.
So long as they are stored correctly, you can continue to have these crystals for years to come. If you want to experiment with more crystals, many other solutions are similar to copper sulfate crystals and, therefore, just as simple.
We hope you enjoyed this article and that you have plenty of fun making your own homemade crystals.
Hi, my name is Andrea Daehma and I have been collecting and using crystals in my everyday life for just over six years now.
I have my own collection of crystals gracing my house, several for every scenario I could think of.
Learning about crystals has truly changed my life, and I want to help others turn their life around too. Please enjoy my website and find your own small stone to begin your crystal journey with!