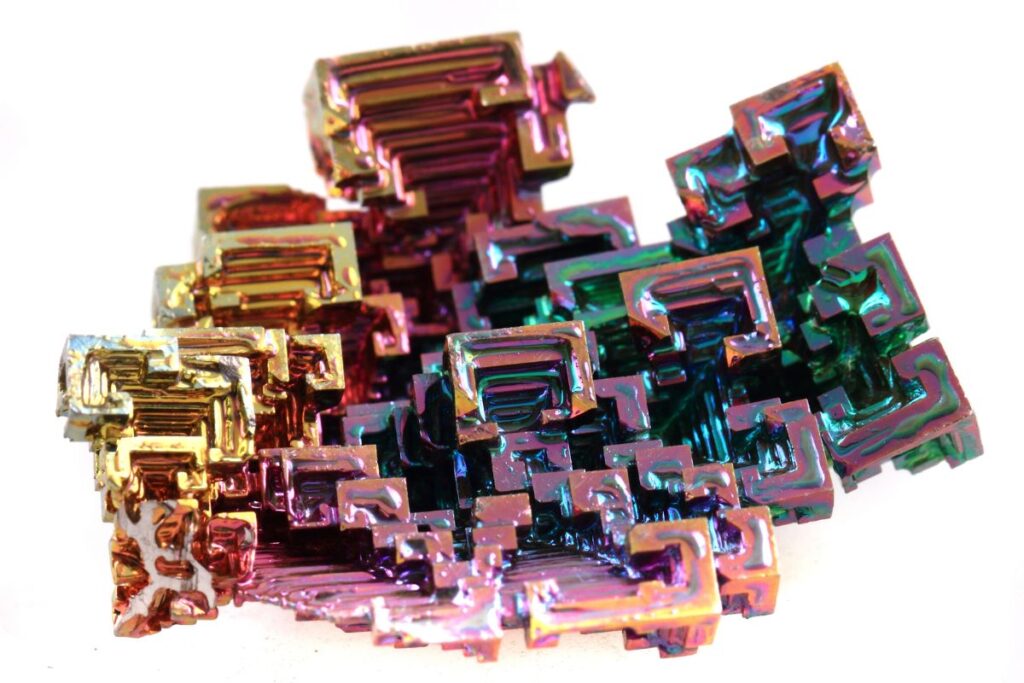
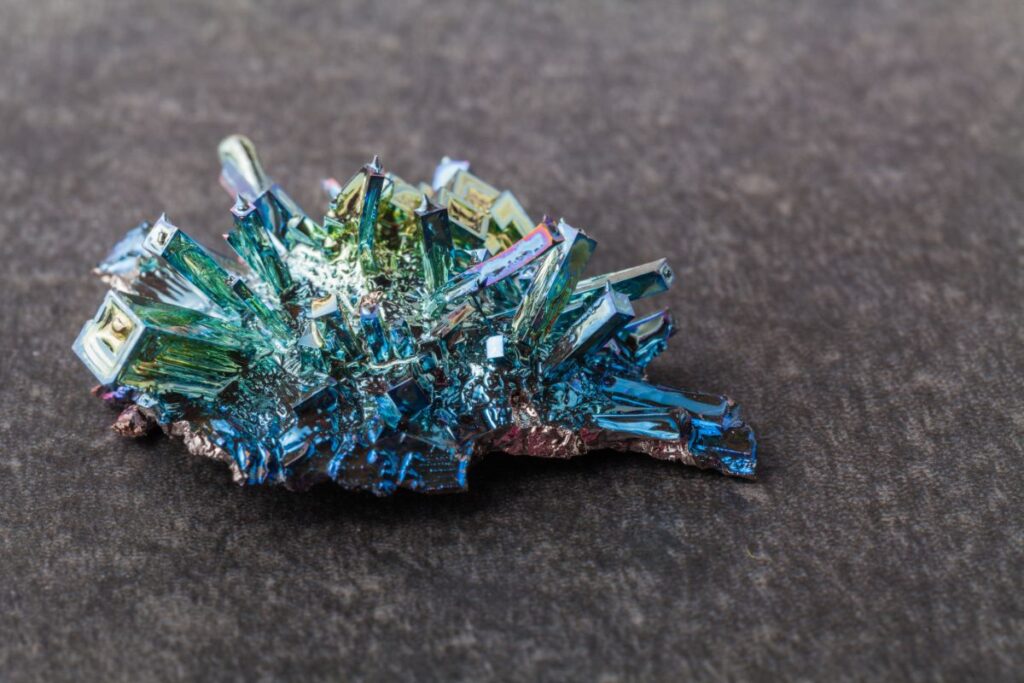
Bismuth, a brittle, crystalline metal with a slightly pinkish hue, forms incredibly intricate geometric crystals that captivate the imagination.
With the right set of tools, appropriate safety measures, and meticulous attention to detail, crafting your own bismuth crystals can be a deeply rewarding experience.
This definitive guide is designed to be your resource for making your very own bismuth crystals at home.
What Are Bismuth Crystals Made Of?
Bismuth crystals are made of bismuth atoms arranged in a particular crystalline structure.
Bismuth is a chemical element with the symbol “Bi” and atomic number 83. It is a post-transition metal that is part of the periodic table and shares similar properties with elements like antimony and arsenic.
When bismuth is melted and then slowly cooled, it forms intricate, geometrically complex crystals with a stair-step-like structure.
These crystals often exhibit vibrant iridescent colors, ranging from pink to green, due to a thin oxide layer that forms on the surface.
The unique crystalline arrangement and oxide layer are responsible for the crystal’s characteristic appearance.
It’s worth noting that while bismuth crystals are often grown for scientific or aesthetic purposes, naturally occurring bismuth crystals are relatively rare.
Making bismuth crystals at home can be an engaging and educational experience for various reasons.
First, the process of melting and cooling bismuth to form crystals provides a hands-on lesson in chemistry and material science.
It offers insights into the states of matter, phase transitions, and crystal structures, making it an excellent educational project for both children and adults interested in science.
Second, the aesthetic appeal of bismuth crystals makes them ideal for display or even for gifting.
The vibrant, iridescent colors and unique geometric shapes of these crystals can serve as an intriguing conversation piece or as part of a larger art or mineral collection.
Third, making bismuth crystals can be a relatively safe and straightforward activity, requiring only a few basic materials such as a heat source, a melting pot, and bismuth ingots.
This makes it accessible to individuals who may not have specialized equipment or a scientific background.
However, it’s crucial to follow safety guidelines, including the use of personal protective equipment like gloves and eye protection and ensuring proper ventilation due to the fumes that can be emitted during the melting process.
Lastly, the process of making bismuth crystals at home offers a sense of accomplishment.
The act of transforming a solid chunk of bismuth into a complex, beautifully colored crystal can be rewarding and fulfilling, offering not just an educational experience but also a sense of wonder and creativity.
Materials And Tools To Make Bismuth
Are you ready to make bismuth crystals at home? Here’s what you will need:
Bismuth Ingots
Begin by acquiring 1 to 2 pounds of bismuth ingots. The purity of the ingots is crucial for the quality of your crystals.
Experts recommend opting for 99.99% pure bismuth ingots, which are readily available from specialized suppliers online.
Cooking Apparatus
Stainless Steel Pot: Choose a pot that you’ll use solely for this project.
Stirring Spoon: A stainless steel or wooden spoon is required for stirring the melted bismuth.
Heat Source: A propane burner or stovetop capable of maintaining a high temperature.
Safety Gear
High-Temperature Gloves: Essential for handling hot equipment and materials.
Safety Goggles: Protect your eyes from any splashes or fumes.
Well-Ventilated Space: Ensure you have proper ventilation to avoid inhaling any fumes.
Miscellaneous Tools
Thermometer: A high-range thermometer can be extremely helpful for monitoring the temperature of your molten bismuth.
Tweezers or Tongs: These will be used to extract the crystal.
Bowl of Water: This is optional and is used for rapid cooling of the crystal.
In-Depth Safety Precautions
Creating bismuth crystals requires you to work with molten metal, and this comes with its own set of risks.
Child Safety: Make sure no children or pets enter your workspace. Or, if you are doing this experiment with children, be very cautious.
Chemical Safety: Although bismuth is generally considered to be one of the less toxic heavy metals, it’s still crucial to avoid ingestion or inhalation.
Fume Extraction: If you’re working indoors, a fume extractor can be beneficial.
Step-by-Step Guide To Making Your Bismuth
Follow these steps for creating your own bismuth:
Phase 1: Preparation
Workspace Setup: Your workspace should be clean, organized, and free from any distractions.
Safety Gear: Don your safety goggles and high-temperature gloves.
Phase 2: Melting The Bismuth
Preheating the Pot: Place your pot on the heat source and preheat it.
Inserting the Ingots: Place the bismuth ingots carefully into the pot.
Temperature Monitoring: Keep a close eye on the thermometer.
Phase 3: Crystal Formation
Cooling: This is where the magic happens. Allow the molten bismuth to cool naturally. Observation and Timing: Observe the edges; this is where crystallization will usually begin. Crystal Extraction: Once you see the formation of crystals, carefully extract them with tongs or tweezers.
Phase 4: Additional Tips
Cooling Speed: Control the rate at which your bismuth cools; this will influence the size and shape of your crystals.
Reusability: One of the advantages of bismuth is that it can be melted down and reused multiple times.
Cleanup: Any leftover bismuth can be stored for future projects.
In Summary
Bismuth crystal formation is not just a scientific experiment but an art form.
It combines the technical aspects of melting and cooling metal with the aesthetic pleasure of creating a naturally beautiful object.
It’s an exciting and rewarding process that requires a meticulous approach and adherence to safety protocols.
With this comprehensive guide, you are well-equipped to make your very own bismuth crystals at home.
Frequently Asked Questions
Can I Color My Bismuth Crystals?
Yes, bismuth crystals naturally develop a thin oxide layer that displays a range of colors. The color depends on the thickness of the oxide layer, which is influenced by the rate of cooling.
How Can I Get Larger Crystals?
The slower you allow the bismuth to cool, the larger the crystals will generally be. However, this is also influenced by the purity of your bismuth and your extraction timing.
Hi, my name is Andrea Daehma and I have been collecting and using crystals in my everyday life for just over six years now.
I have my own collection of crystals gracing my house, several for every scenario I could think of.
Learning about crystals has truly changed my life, and I want to help others turn their life around too. Please enjoy my website and find your own small stone to begin your crystal journey with!